20 Tips for Creating an Art Space for Kids
If you click on a link and/or make a purchase, I may receive a commission at no extra cost to you. For more information, please read my Affiliate Disclosure. All opinions are my own and based on my personal experience with the product or service unless otherwise stated. Thank you for supporting my small business!
Creating an art space for your kids is a great way to encourage creativity and self-expression in children. However, it can be challenging to design a space that is both functional and fun. In this post, I will give you 20 Tips for Creating an Art Space for Kids, based on my experience and mistakes!
Should you have a designated room or can it be a corner in the living room? What supplies should you invest in? And how do you keep everything organized? Don’t worry, we’ve got you covered with 20 Tips for Creating an Art Space for Kids. You’ve got this Mama!
Choosing an Art Space Location
Choosing the right location may be the most important of my 20 tips for creating an art space for kids. Moving an art space is not impossible, but can be a pain, so best to choose wisely the first time you set it up!
Having a designated art space will keep the art supplies contained in one area. Choose an area with enough space for your chosen art table, along with some sort of organizational method to contain the art supplies.
When choosing a location in your home, be sure to consider proximity to your furniture, flooring under the art space (in case markers fall), and possible supervision concerns if needed. For example, a corner of your living room may be easily accessed, and you can see it from the kitchen, but what happens if someone drops a marker or “slips” and colors on the couch? A few things to consider based on my experiences!
Selecting the Perfect Art Workspace
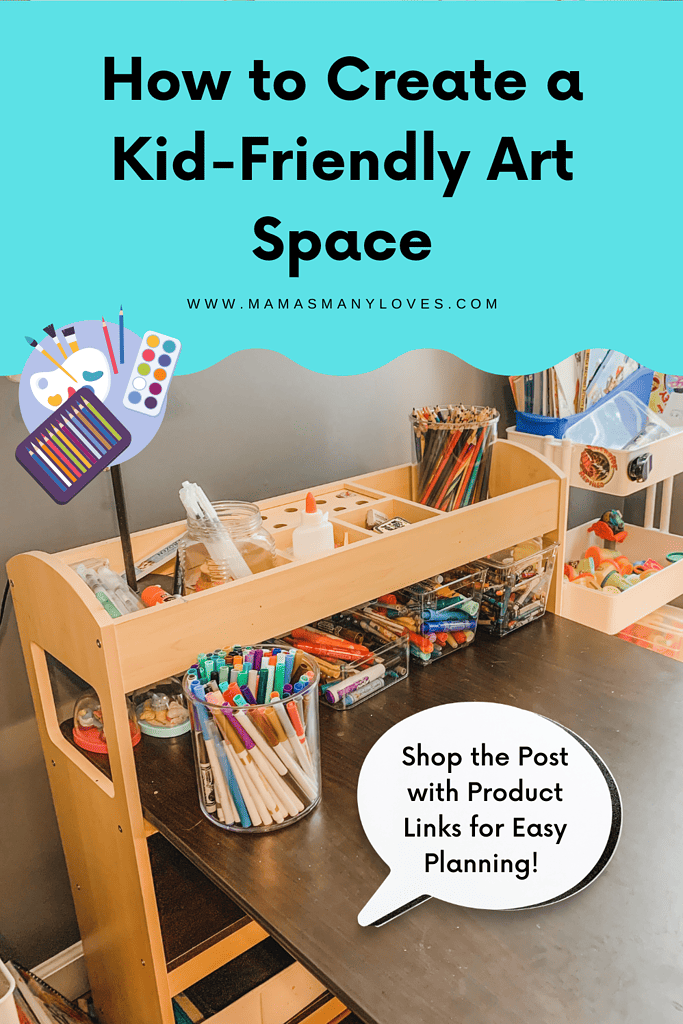
Art workspaces are the core of the art space as it is where the magic happens. Ideal workspaces vary by child, family, and size of the art space. There is no one size fits everyone for this, but here are some things to consider when choosing a workspace/desk/table.
Tables should include storage space (shelves, drawers, etc) and be easy to clean! Some tables include art display options such as built-in bulletin boards, but I didn’t love any tables with those options and instead created a separate art display area.
I have tried separate desks for my kids’ art space, but found them to be too small, and finally caved, purchasing an art table for both kids to share. The table I chose has chairs on both sides and is wide enough for both kids to color and draw at the same time, without their papers touching.
It offers a shelf on top of the table for storage and additional storage space underneath. This Costway 3-Piece Kids Wood Top Art Table & Chairs Set, available at Home Depot, is the closest I can find to mine, that includes those features.
I’ve linked to similar art tables below, in different colors and styles for you to check out and browse. Simply click your favorite table to shop the post.

Lighting the Art Space
Consider the lighting when choosing the location for your kids’ art space. Natural light is ideal, as it not only illuminates the space but also enhances the colors of the artwork. If you can, set up the art space near a window.
If natural light is not an option, make sure you have adequate artificial lighting. Simply place a lamp near or on the table, or set it up under your ceiling lighting.
Our art space is right near a window, however, we also have a small lamp that illuminates it in the evening. Desk lamps are perfect because they typically have a small footprint, but offer a lot of light.
Invest in Age-Appropriate Art Supplies
Investing in age-appropriate supplies is essential when creating an art space for your kids. Having the right supplies not only makes the art-making process easier and more enjoyable but also allows your child to experiment with different mediums and techniques.
For younger children, consider purchasing non-toxic, washable supplies. You never know when a little one will eat or lick their art supplies. This can include crayons, markers, and finger paint. As your child gets older, you can introduce them to more advanced supplies such as acrylic paints, watercolors, and oil pastels.
When selecting supplies, take into consideration your child’s skills and interests. If your child loves to draw, invest in high-quality drawing pencils or markers. For a child interested in sculpture, provide them with modeling clay or playdough.
Organize Art Supplies for Easy Access
When art supplies are organized and within reach, it encourages children to be more independent and creative. This could lead to a few uninterrupted minutes for you and make clean-up a bit easier. Easy access to art supplies also enables them to be enjoyed more by your kids.
There are many different ways to organize art supplies. For example, you might use shelves with baskets, or drawers for papers and coloring books alongside containers for markers, pencils, and other drawing tools. If your children enjoy painting, don’t forget about brush and palette storage.
When setting up your art space, think about the activities that your children enjoy the most and organize their supplies accordingly. That way, they can easily find what they need and start creating without needing you thus encouraging their creative independence and maybe a few free minutes for you!
How to Store Kids’ Art Supplies
An important aspect of creating a functional art space is providing adequate storage for your child’s art supplies. Without proper storage solutions, your art space can quickly become cluttered and difficult to navigate.
Organize art supplies such as markers, crayons, pencils, paintbrushes, and paper near or on the art table, in an easily accessed location. Giving each item a designated spot makes it easier for your child to find what they need and encourages them to put their materials away when they’re finished.
Consider Open Storage for Art Supplies
I know it is nice to have closed storage to hide all of the art supplies. However, making it difficult to locate art supplies, will make it less likely that kids independently find them and put them away.
By utilizing open storage, your child can see where things go without having to dig around. For example, all of the coloring books are in a stack here, so this one goes there too. Or all of the markers are in this visible container, please put them back when you are done using them.
Open storage for art supplies can add color and decor to your room. Embrace the colorful nature of art supplies when choosing your storage solutions.
Use Clear Bins for Kids Art Supplies
I love tall clear cylinders for storing colored pencils and markers. I recommend a height of 6 inches. This keeps markers from falling out but isn’t too tall that it blocks access. My containers have a 6-inch diameter as well and hold close to 100 markers or pencils.
Our crayons are stored in these taller, clear stackable containers, for easy viewing and access. I also use a shorter version of these clear, stackable containers to store paintbrushes and paints. The vibrant colors of the pencils, markers, and crayons brighten up and decorate the space.
Labeled Drawers for Art Supplies
Another option is using drawers for supplies, especially if you are not comfortable with open storage. I would highly advise labeling the drawers if the contents are not easily visible to avoid all of them being pulled out at once to find things.
Labels can be written words, or photos of crayons, markers, etc if your child cannot read. Pinterest has a variety of printable drawer labels available to help you organize.
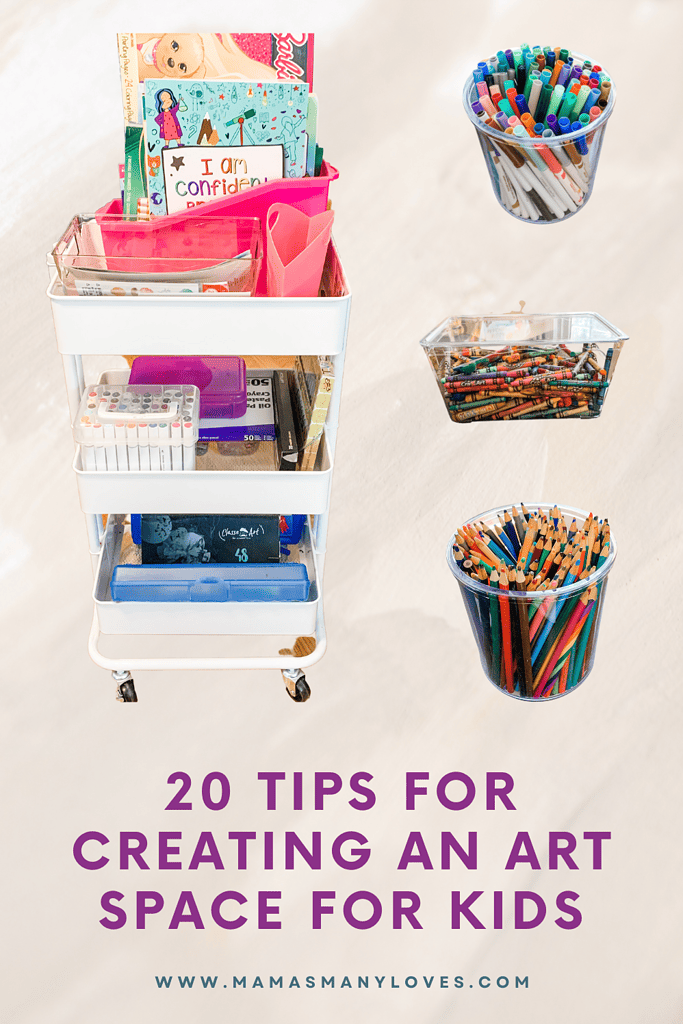
Make an Art Cart
Containers do take up table space if there are no shelves to store them. I add space off of the art table on art carts. Only the supplies the kids are actively using need to take up valuable table space, with the rest stored on shelves or the art carts.
What are art carts? Simply a storage cart I organized for each child to contain their art supplies in one place. Each child has one, filled with their own art supplies, to avoid confusion and fighting.
I highly recommend these 3-tier metal rolling carts. I have purchased and converted two of them into art carts. These carts are narrow to easily fit next in your art space. They have 3 levels of open, visible storage, and are magnetic which can help with decorating and attaching accessories. These particular carts have wheels so kids can move them easily, without spilling the contents on the way.
Maintain Your Child’s Art Space
I have made the mistake before of making a beautiful new art space, and leaving it to the kids to figure out how to use it, where things go, etc. It did not work out. Here are a few ways to help keep the art space organized and usable.
Assign Everything a Designated Space
Ensuring there is space for everything, helps to keep the area clean and organized.
Also, by making the space easy to see and accessible for kids, there is a greater chance that things will end up back where they belong and easier to find next time. It saves time to quickly organize it each time, instead of after it is a disaster!
Recycle Broken Crayons
Make sure to regularly sort through your child’s art materials and recycle any broken crayons that are no longer usable. My kids love taking broken crayons and recycling them into new crayons using silicone molds. Amazon has a huge selection of silicone molds to choose between.
Throw Away Dead Markers
Nothing kills creativity faster than grabbing a marker only to find out it has dried up or lost its color. Take the time to periodically go through your child’s art supplies and throw away any markers that no longer work.
This will save frustration during art time and help declutter the space, making room for new, functioning markers. Advise the kids to throw away any broken markers they find, encouraging them to help maintain their new art space.
Weed Out Coloring Books Periodically
Coloring books can quickly become filled and no longer usable. At that point, they are just taking up valuable space and creating clutter. Every once in a while flip through your kids’ most used coloring books and remove them if full. Be sure to keep any completed pages that kids may want to be displayed, or that you’d like to keep for the future.
Encourage Creativity in Your Child’s Art Space
By providing a structured art space for your child, you are creating an environment that fosters creativity. Encouraging creativity is essential to help your child develop their imagination and problem-solving skills.
By making supplies easily accessible and visible as above, you are promoting creativity and independence in the art space. This can inspire your child to experiment with different mediums such as paint versus markers or pencils versus crayons.
Incorporate fun activities that stretch their imagination, like drawing prompts, coloring books, or craft kits. Some kids need extra inspiration, others don’t. Follow your child’s lead.
How to Display Your Child’s Artwork
In addition to providing storage for art supplies and creating an environment conducive to creativity, don’t forget to incorporate space to display your child’s masterpieces! By hanging up their art, you can develop a sense of pride and accomplishment that will motivate them to continue creating.
Consider choosing a central location in or near the art space that is easily accessible and visible. Decide whether or not you want your child to be able to access the display, and, if not, be sure to raise it above their level.
Artwork displays do not have to be crazy Pinterest-inspired art walls. They can be as simple as frames you have once and replace the art, hanging a clothesline, or even a corkboard/bulletin board with cute pushpins to display their favorite creations.
Display Artwork with Interchangeable Frames
We use these Macro Gallery frames to display artwork in the kid’s playroom, in addition to their art space display area. Each frame holds 4 pieces of standard paper-sized art.
I love this type of frame because it is easy to change out the artwork, without having to remove the frame from the wall. Multiple art pieces fit in each frame, creating artwork storage too.
I like to start fresh each school year and stack the new art throughout the year. At the end of that school year, remove the art and place it straight into your child’s school paperwork organization system. Don’t have one yet? No worries, check out my post on how to organize your child’s school paperwork.
Utilize a Clothesline Art Display to Showcase Artwork
I think this is the easiest, safest, and least expensive way to display your child’s artwork. We have this type of art display above our art table.
Simply place tacks in the wall and string yarn, thin rope, or kitchen twine between the tacks. I love these small, bright clothespins to clip their art to the line.
Bulletin Board Art Display
If you have a bulletin board lying around, this is a quick and easy way to display your child’s art. Simply hang the bulletin board and tack up the art pieces. You can find cute pushpins to add inspiration too.
My only reservation with this is pushpins and tacks make me nervous with little kids and pets so I prefer not to use them.
Relax and Enjoy
This may be easier said than done but try to relax and let the kids enjoy the art space you have created. Hovering and trying to control the play can be stifling and not fun for anyone.
Trust that you have put your kids’ art space in a place that is safe and away from fragile/easily stained items. Trust that you have safe, non-toxic, age-appropriate art supplies for the kids to enjoy. Watch their creativity blossom in the new creative space that you have given them.
20 Tips for Creating an Art Space for Kids
I hope these 20 Tips for Creating an Art Space for Kids helped you to feel empowered to create your kids’ art space. A home art space is a wonderful way to encourage your kids’ creativity and self-expression.
Considering the location, lighting, age-appropriate supplies, and storage solutions, will help you design a functional and fun space that they will use and enjoy. Remember to show off your child’s artwork in an art display, and update it frequently with their favorite masterpieces.
Be sure to tag me on Instagram @MamasManyLoves to show off your kids’ art space!! Happy creating!!